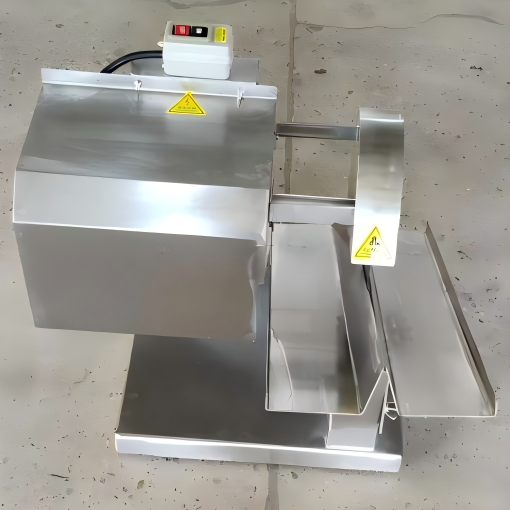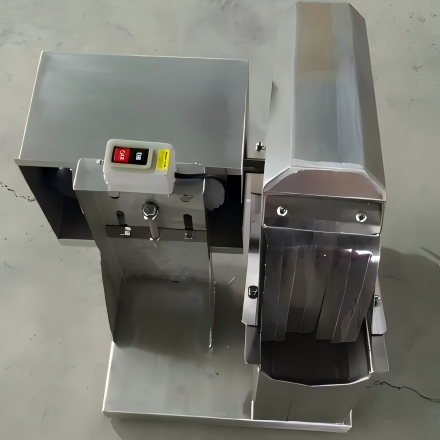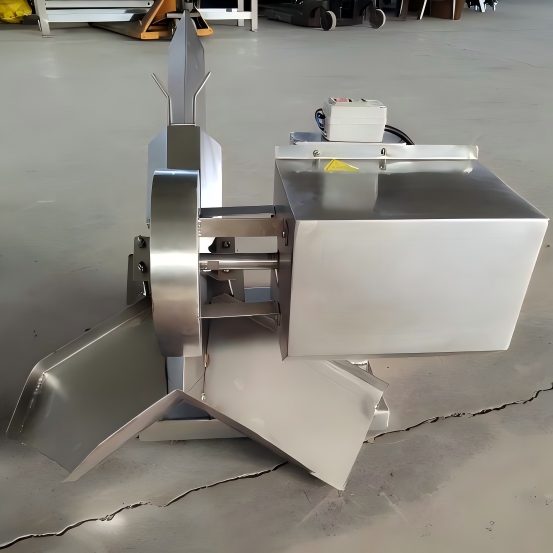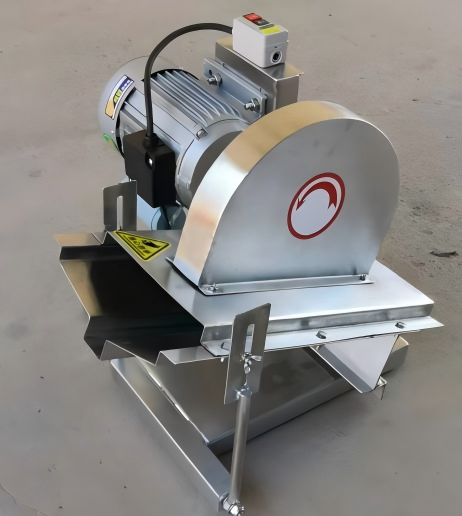
Poultry Neck Splitting Machine
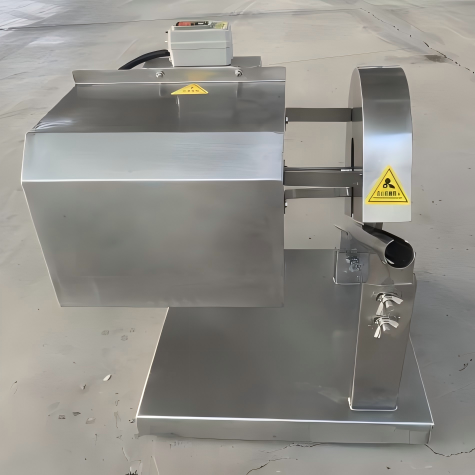
A robust, high-performance splitting machine engineered specifically for fast and clean splitting of chicken and duck necks. Built from food-grade stainless steel with a powerful 1.1kW motor and dual-voltage support, this compact 35kg machine ensures precise alignment, stable cutting, and outstanding hygiene for poultry processing plants.
Contact Us for Pricing
Interested in this product? Contact us now for detailed pricing and product information.
Product Details
I. Product Overview
The Poultry Neck Splitting Machine is a specialized, high-efficiency equipment engineered specifically for the fast, clean, and safe splitting of chicken and duck necks.
Constructed entirely of high-grade, food-safe stainless steel, this 35kg machine features a compact footprint, easy operational layout, and straightforward washdown capabilities. It is a highly cost-effective and essential processing solution for poultry processing plants, central kitchens, and wholesale meat markets aiming to maintain strict hygiene standards and maximize throughput.
II. Structural Features & Working Principle
1. Key Structural Features
- Precision Splitting Guide: Outfitted with a specialized neck guide channel that securely holds poultry necks in place for a perfectly centered, hands-free cut.
- High-Speed Alloy Blade: Equipped with an oversized, wear-resistant circular blade that cleanly divides meat and vertebrae without crushing the bone structure.
- Compact & Safe Footprint: At 400×400×500mm, it integrates seamlessly into existing processing lines, providing maximum structural stability.
- Sanitary Washdown Design: Fully enclosed motor and smooth stainless steel panels permit fast, comprehensive washdowns for outstanding sanitation.
2. Working Principle
When the machine is powered on, the motor drives the circular alloy blade to rotate at high speeds. The operator places the chicken or duck neck into the custom-designed guide channel and gently slides it forward toward the rotating blade. The high-speed cutting disc instantly and cleanly slices through the neck bone and surrounding tissue, yielding two uniform, perfectly split neck halves.
III. Main Technical Parameters
| Parameter | Specification |
|---|---|
| Model | Poultry Neck Splitting Machine |
| Function | Splitting chicken and duck necks |
| Structural Material | Premium Food-grade Stainless Steel |
| Rated Voltage | 220V / 380V (Dual-voltage options) |
| Motor Power | 1.1 kW |
| Blade Diameter | Φ200 mm / Φ250 mm (Optional) |
| Machine Weight | 35 kg |
| Overall Dimensions (L×W×H) | 400 × 400 × 500 mm |
| Export Wooden Case Size | 580 × 540 × 570 mm |
| Gross Weight (With Case) | 47 kg |
IV. Installation & Commissioning
1. General Installation Procedure
- Place the cutting machine on a flat, solid, and non-slip workbench to eliminate vibration during operation.
- Ensure the onsite power supply matches the rated voltage (220V single-phase or 380V three-phase).
- Connect the power cable securely. For 380V three-phase configurations, verify that the blade rotates in the correct direction (indicated by the arrow on the safety guard).
- Idle the machine (run empty) for 1–2 minutes to inspect for any abnormal noises or excessive vibrations.
2. After-Sales Service
Installation, commissioning, and regular technical maintenance can be conducted by our company’s professional engineering team or under remote guidance from our customer support center.
V. Safe Use & Precautions
1. Before Use
- Read the operator manual thoroughly to understand the basic structure and safety rules.
- Check if the blade fastening nut is securely tightened.
- Ensure the protective guard is securely in place and has no structural damage.
2. Operational Safety
- Strictly Prohibited: Do not push poultry necks towards the blade with bare hands when close to the cutting area. Always maintain a safe distance and use the guide channel.
- Do not wear loose clothing, necklaces, or loose gloves that could get caught in the high-speed rotating blade. Long hair must be tied back.
- Always disconnect the power plug before performing cleaning, adjustments, blade replacement, or maintenance.
3. Safety Pictograms
| Symbol / Hazard | Safety Meaning & Precautionary Measures |
|---|---|
| Danger | High-speed rotating blade hazard. Keep hands and fingers strictly away from the blade. |
| Danger | Electrical shock hazard. Disconnect the main power source before opening the electrical enclosure. |
| Warning | Sharp blade edge. Handle with extreme care during maintenance, blade cleaning, and replacement. |
| Warning | Do not operate the machine with safety guards or safety shields removed. |
4. Daily Maintenance
| Frequency | Maintenance Task Description |
|---|---|
| Every Shift | Clean meat residue and fat off the blade and stainless steel housing with warm soapy water. |
| Every Week | Inspect the tightness of the blade fastening nut and the motor mounting bolts. |
| Every Month | Inspect the circular blade for dullness or micro-chips; sharpen or replace if necessary. |
| Every 3 Months | Check electrical wiring insulation and ensure the main ground wire is connected securely. |
VI. Simple Troubleshooting
| Problem Encountered | Possible Root Cause | Recommended Solution |
|---|---|---|
| Motor does not start when switched on | 1. Power plug is loose. 2. Internal wiring or capacitor is damaged. |
1. Check and secure the power connection. 2. Contact professional technicians to inspect wiring. |
| Jagged or crushed meat cuts | 1. Blade is dull or chipped. 2. Blade is installed in the reverse direction. |
1. Sharpen or replace the circular cutting blade. 2. Re-install the blade in the correct rotation direction. |
| Heavy machine vibration or abnormal noise | 1. Blade fastening nut is loose. 2. Blade is deformed or unbalanced. 3. Motor bearings are worn out. |
1. Stop the machine immediately and tighten the blade nut. 2. Replace the deformed or unbalanced blade. 3. Replace the motor bearings. |
| Motor overheats during operation | 1. Overloading (feeding poultry too quickly). 2. Input voltage is unstable or too low. |
1. Reduce the feeding speed; allow the motor to cool down. 2. Inspect and stabilize the input power voltage. |